
If you’ve ever tried to cut glitter cardstock with your Cricut and ended up with torn edges, jammed mats, or glitter everywhere… you are definitely not alone.
😩 The struggle to cut glitter cardstock with Cricut is real. However, the solution is simple once you know the right tools and settings.
Glitter cardstock is beautiful — but let’s be real, it can be a nightmare if you’re not using the right blade pressure or adhesive strategy.
Understanding how to cut glitter cardstock with Cricut can make all the difference.
Want free resources to help you create and grow?
Check out my resource library for instant access to guides, templates, and tools you can start using today.
How to Cut Glitter Cardstock with Cricut
If you’re new to using Cricut or still learning your way around Design Space. Mastering the art of how to cut glitter cardstock with Cricut is a great project to build your confidence.
You’ll get hands-on with features like the offset tool, weld, and score line alignment — and if that sounds intimidating, don’t worry. I’ll break it all down step by step.
Grab the free SVG!
Go to file #216 in the free resource library.
Where can I send the resource library files?
Save this post for later, and when you’re ready to try something new, go check out How to Layer HTV on a Shirt, How to Make a Cricut T-Shirt, or How to Make Cricut Cutaway Cards. Let’s keep creating.
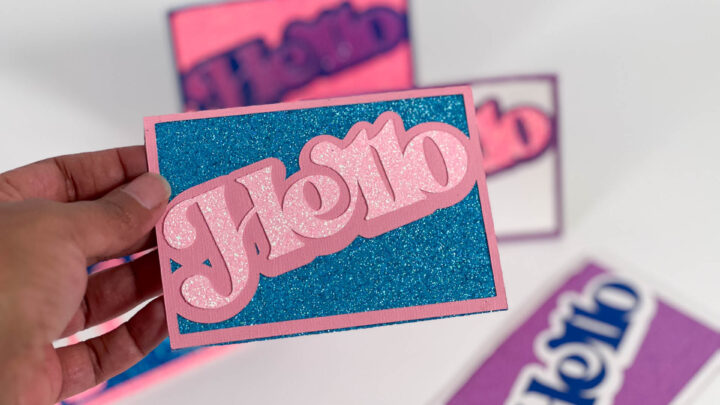
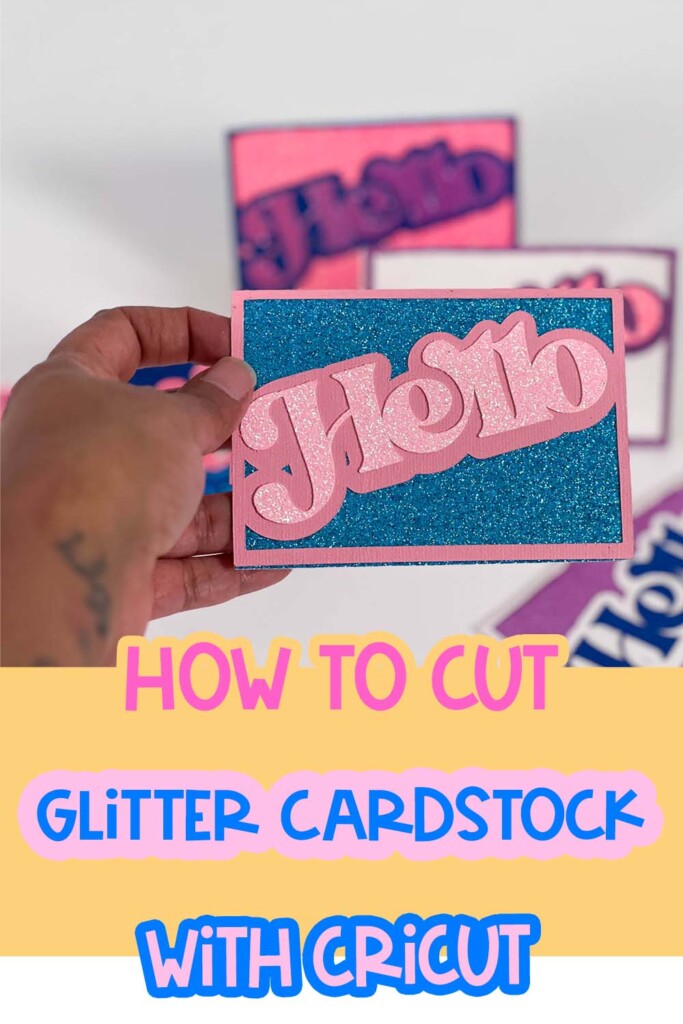
How to Cut Glitter Cardstock with Cricut + Free SVG
Learn how to make glitter cards with your Cricut using a free SVG! This step-by-step tutorial shows you how to cut glitter cardstock cleanly—no tearing.
Materials
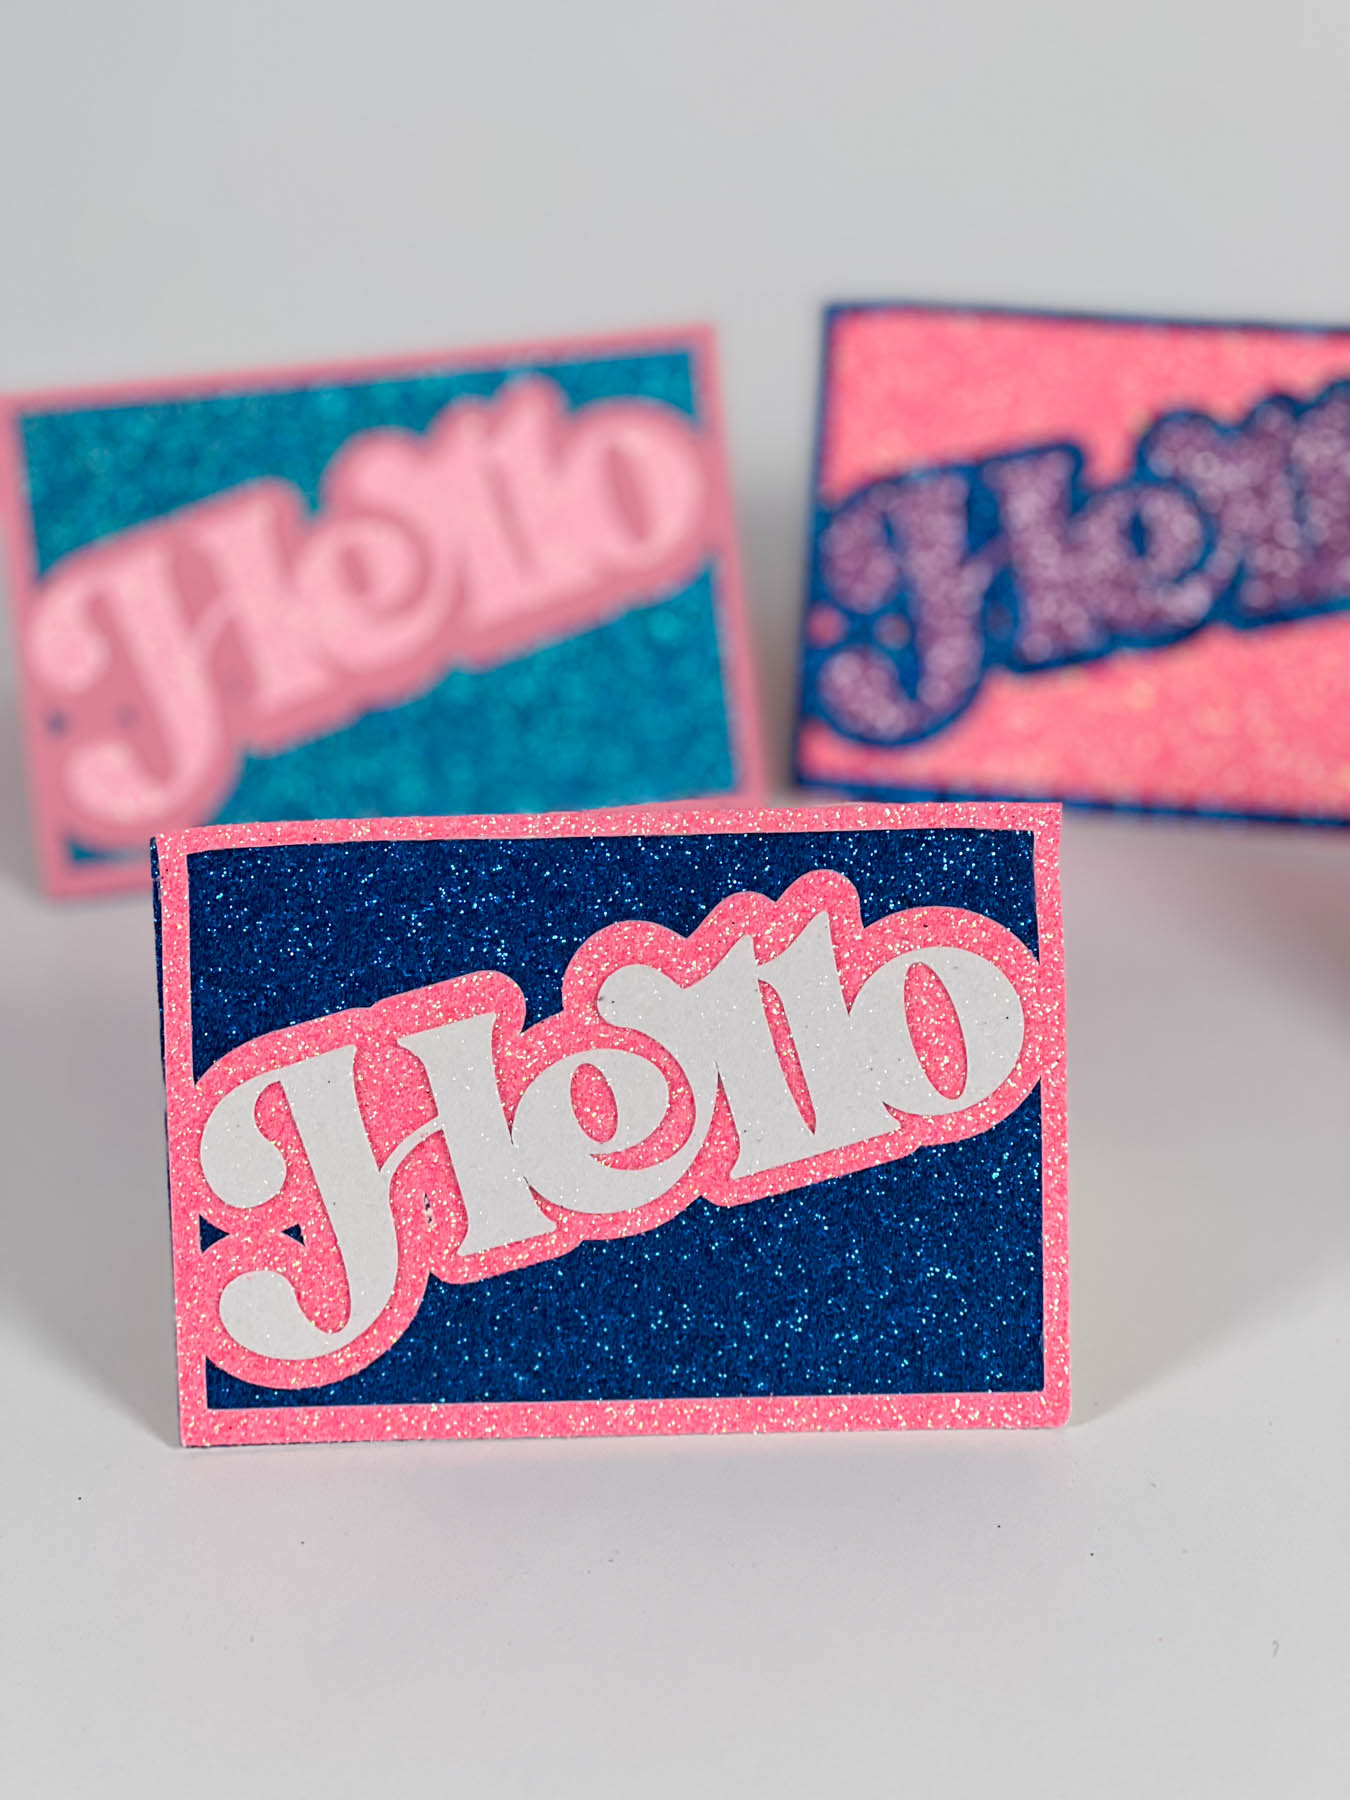
- 3 Colors Glitter cardstock (I used The Craft Print and Park Lane stacks)
- Cricut Standard Grip Mat
- Free SVG file (linked below)
- E6000 glue or adhesive of your choice
- Brayer, scissors, tweezers (optional but helpful)
Tools
- Cricut Design Space
- Cricut machine (Explore Air or Maker)
Instructions
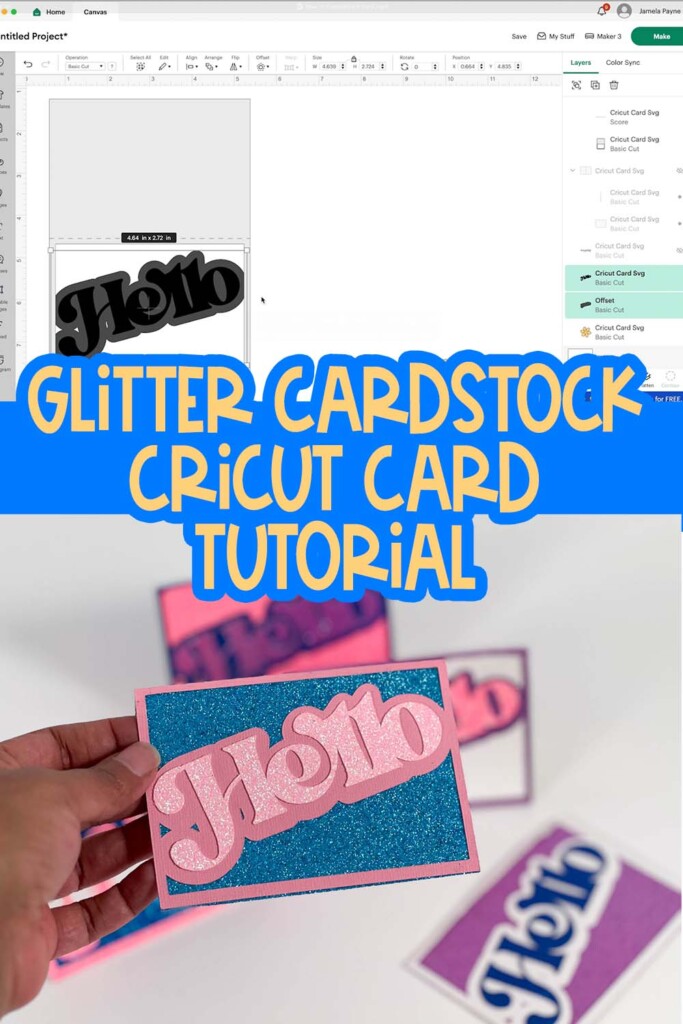
- Upload the SVG in Cricut Design Space: Open a new canvas, click "Upload", and bring in the provided SVG file. Once it’s in your canvas, ungroup the layers so you can work with each part individually.
- Customize Your Card: Turn off any extra design elements you don’t want to use. Add an offset to your word layer and adjust the sizing so it fits inside your card’s frame. You can use any word or image here to make it your own.
- Set the Score Line: Select the score line layer and change the operation to “Score.” Align it with your card base, then select both the score line and card base and click "Attach."
- Cut Your Layers: Use the glitter cardstock setting in Cricut Design Space. I recommend setting your mat to 12"x12", brayering your glitter cardstock down really well, and letting Cricut do its thing.
- Assemble the Card: Gently remove your layers from the mat by flipping the mat upside down and peeling it away from the material (not the other way around!). Use glue sparingly on the back of the word layer, especially when working with glitter. Tweezers can help you place the design perfectly without smudges.
- Add the Backer: Cut a rectangle insert for the inside of your card. Add glue along the edges and line it up with the score fold. Use a brayer to press everything flat.


