
Disclosure: This post on Kittl mockups is part of a collaboration with Kittl and contains affiliate links. If you sign up through my link or use my code, I may earn a small commission at no extra cost to you.
Being a small business owner means wearing every hat. You make the product, you create the content, and then you still have to photograph everything for your shop, whether you sell on Etsy, Shopify, or WooCommerce. Kittl mockups have taken at least one of those jobs off my plate. Kittl reached out earlier this year to collaborate, and since then I’ve been using their AI mockup tools for my own shop. I wanted to break down exactly how I use it, because it’s saved me from burning through physical inventory just to get decent product photos.
Why I Use Kittl Mockups Instead of Photographing Every Piece
Product photos are one of those jobs that never ends. Every new design means setting up a shot, getting the lighting right, and making sure the background looks like a shop and not like my craft room. If you sell personalized pieces, it’s even harder, because you’d have to make a sample of every version just to photograph it.
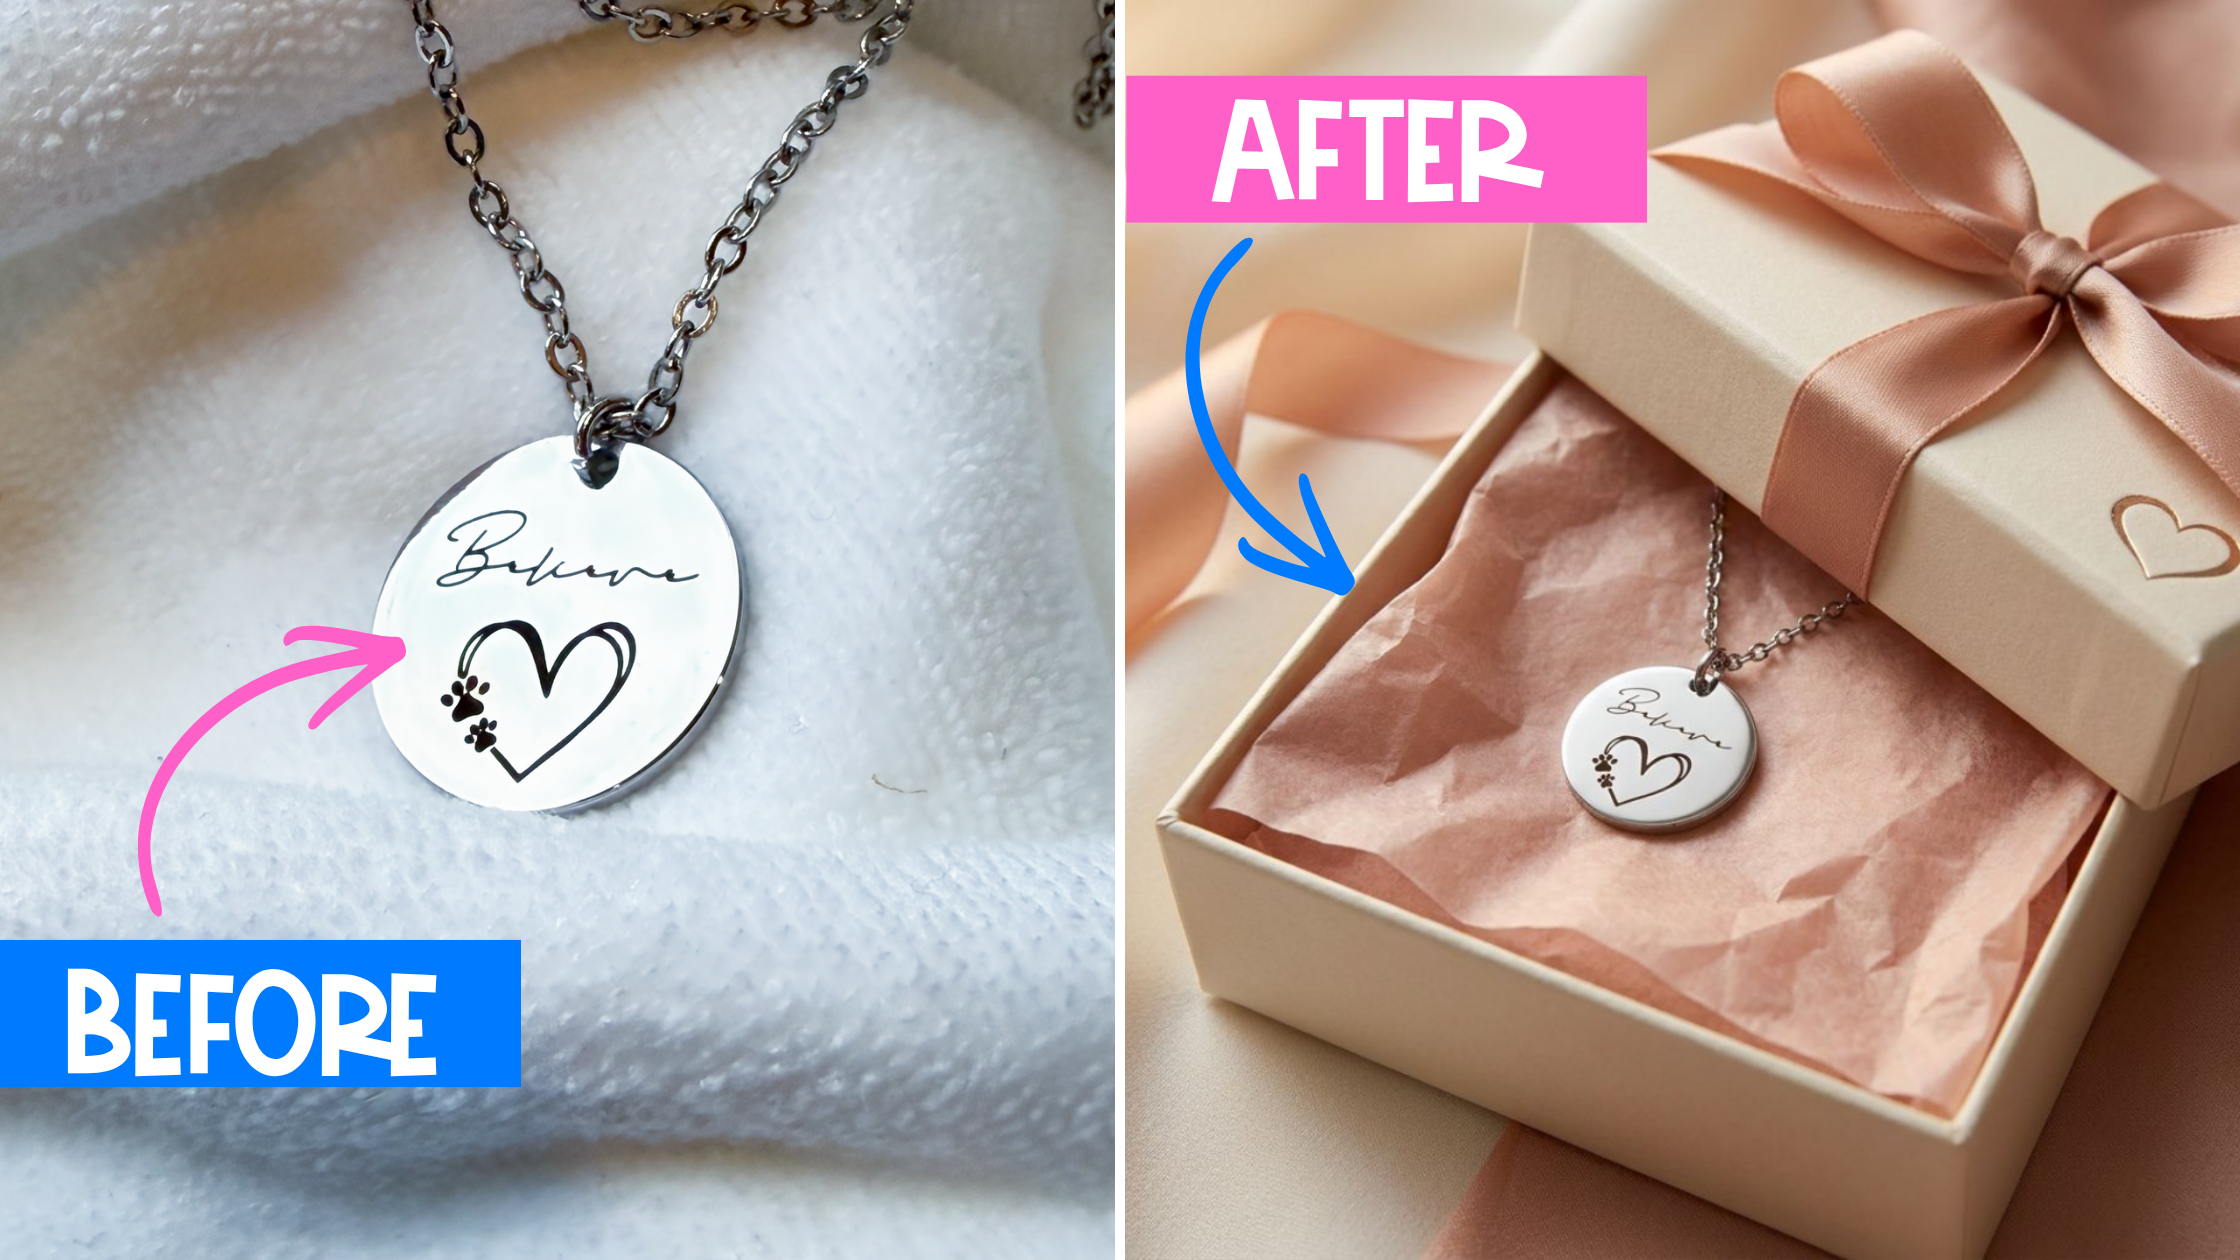
With Kittl mockups, I start from a photo of a piece I’ve already made and let the AI build the scene around it. I get styled, shop-ready images without making extra inventory or setting up a photo shoot. If you’re starting a craft business on a tight budget, not having to make and shoot extra samples is a real savings.
What Is the Kittl Mockup Generator?
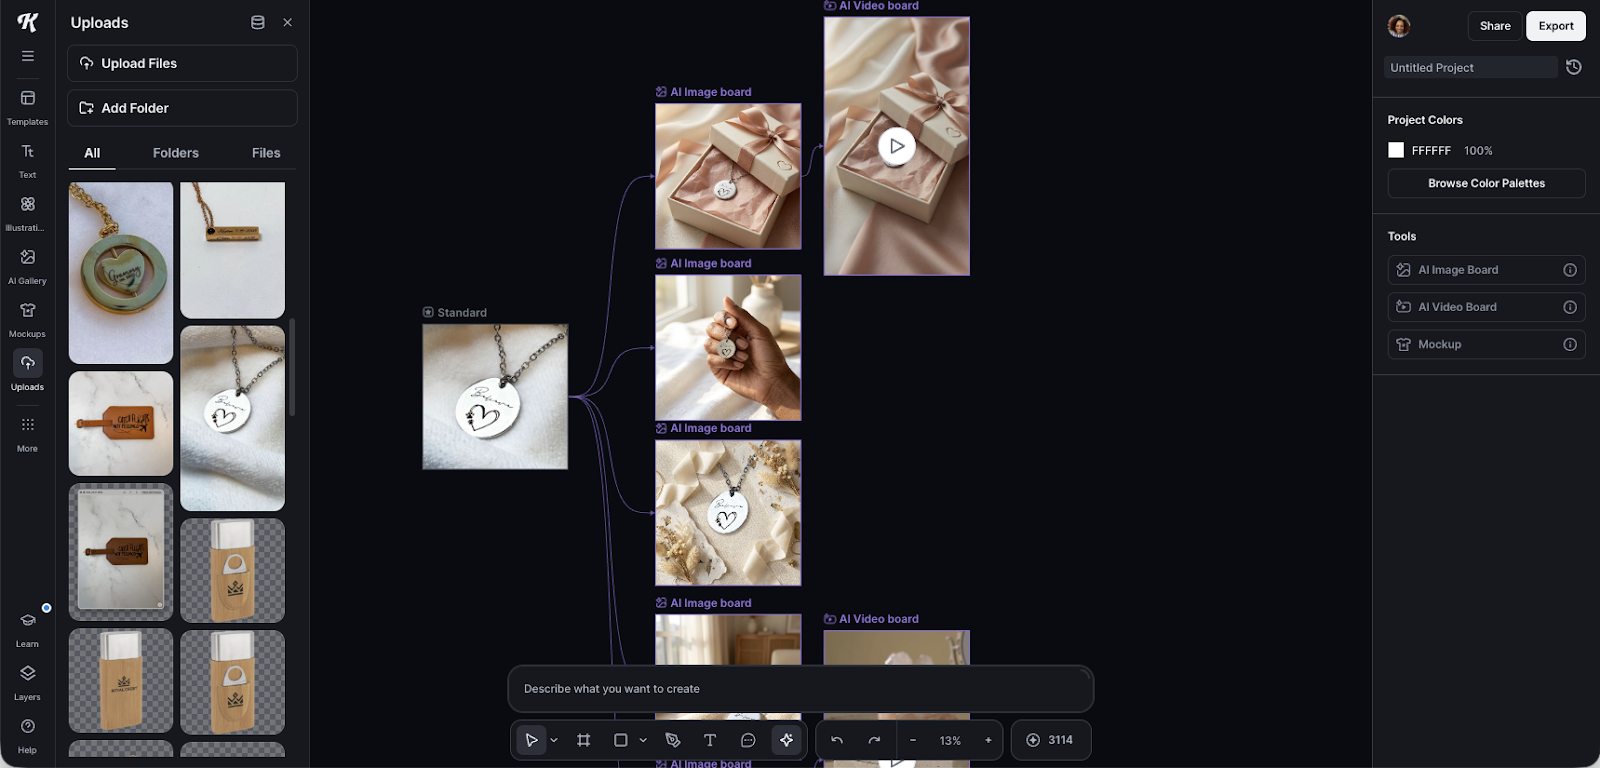
Kittl is an online design platform, and its AI tools include a mockup generator that places your product into realistic scenes based on a text prompt. When you first log in, you’ll see pre-built AI workflows for things like UGC videos, merchandise, product visuals, mockups, and other tools. You can start with those, or build your own workflow on a project board, which is what I do.
What I like about building my own Kittl design mockup workflow is that everything stays connected on one board: the original product photo, every AI image generated from it, and any edits after that. It makes it easy to see which mockups came from which product.
My Kittl Mockups Workflow, Step by Step
1. Start a New Project and Pick Your Canvas Size
Go to Projects and click New Project. I choose the standard 1200 x 1200 pixel size because my shop uses square images. Pick whatever size matches your storefront so you’re not cropping everything later.
2. Upload a Real Photo of Your Product
Instead of generating a product from scratch, I upload a photo of a piece I’ve already made and place it on the board. For the one in my video, I used a necklace I made for a customer. Most of the time I create my product images in other programs and bring them in, but Kittl can also generate content from scratch if you need it to.
3. Write Your Prompt in a Chatbot First
I write my prompt in a chatbot first, not directly in Kittl. Words are hard for me to get right on the fly, and sometimes I can’t fully put into words what I’m picturing. The chatbot helps with that, and drafting the prompt somewhere else first keeps me from burning through credits on trial and error.
Tell the chatbot what your product is, where the image will be used, and the look you’re going for. Then paste the prompt into Kittl and add one more line yourself: “Do not change the size or shape of the attached item.” If you’re keeping a specific product’s exact shape, that one line matters.
4. Generate and Keep Your Image Boards Connected
Make sure your product image is selected, then hit the arrow to generate. Mine takes under a minute. To make more versions, click the arrow on your image and add another AI image board from the same source. That keeps every variation connected in one workflow instead of floating around the board on its own.
5. Make Five or Six Variations
Don’t stop at one image. One mockup isn’t enough for a listing, and more images are better. While the first one generates, I ask my chatbot for five more prompts, add an image board for each, and paste them in. I usually end up with five or six variations from the same source photo, so I have real options to choose from instead of a single so-so shot.
6. Export Your Mockups for Your Shop
Click on any image board to see your options. You can create a mockup from it, upscale it, reframe it, duplicate it, or quick export it. Most of the time I just use Quick Export, change it to 3x, and download. From there, the images are ready to upload to my shop.
Tips for Better Kittl Design Mockups
- Start with a clean product photo. Kittl builds the scene around your image, so the clearer your product is, the better your mockup will look.
- Lock in your product. Always tell it not to change the size or shape of your item so the mockup still looks like what customers will actually get.
- Match your shop’s image size first. Setting the canvas size up front saves you from cropping every image later.
- Plan prompts before you generate. Drafting and tweaking prompts in a chatbot helps you save credits.
- Keep a consistent look. Use similar lighting and styling across a listing so your shop looks cohesive.
- Check the details. Zoom in on engraving, text, and edges before you add a mockup to a listing.
Good photos are a big part of getting your first handmade customer, and they help when you’re testing new handmade items that sell before you commit to a lot of inventory.
Still Learning, But Already Worth It
I’ll be honest: I’m still learning everything Kittl can do. There are pre-built workflows I haven’t touched yet, like UGC-style videos and other merchandise and product-visual templates, beyond the custom mockup workflow I use. But just for product mockups alone, it’s already changed how I handle photos for my shop.
If you’re figuring out whether a tool like this is worth the cost, factor in the time it saves you. My guide on how to price handmade products walks through how to account for your time and expenses.
Want to See It in Action?
I made a full video walkthrough of this exact process.
If you want to try Kittl yourself, code JAMELAPAYNE gets you 25% off your first month. That’s part of our collaboration, and I’ll always tell you when that’s the case.
Kittl Mockups FAQ
Can Kittl make mockups from my own product photos?
Yes. Upload a photo of your product to a project board, select it, and write a prompt describing the scene you want. Adding a line telling Kittl not to change the size or shape of your item helps keep your product accurate.
How long does it take to generate a Kittl mockup?
In my experience, each image generates in under a minute. Making five or six variations of one product takes just a few minutes.
What size should I use for shop mockups?
Use the size your shop displays best. I use 1200 x 1200 pixels because my shop uses square images.
Does Kittl use credits for AI mockups?
AI generations use credits, which is why I write and refine my prompts in a chatbot before I generate. It keeps me from wasting credits on trial and error.
Have you tried Kittl or another mockup tool? Drop a comment and let me know what you’d want to see me cover next inside it.


