Check out this awesome DIY Menu Board Upcycling Project! It’s so simple but adds such a fun farmhouse design element to the kitchen that I just couldn’t resist.
Such a fun project, the kids can even help, if they can hold a paintbrush. But really, I just liked getting back to doing a project that was for me. Not a shirt, not a project for the kids, not a gift. But something I can put in my kitchen and just enjoy.
And whether you have farmhouse kitchen decor thing going on or if you have a modern decor, this is perfect.
Plus, the kids can finally stop asking “what’s for dinner” and, if they do, you can just point them to the menu board. I love it.

Now, I know a lot of meal planning mammas have these complicated weekly menu ideas and need all the days of the week on their menu board, so they can do a whole week’s worth of menu planning.
But I don’t really usually have time to plan out weekly meals. I’m doing good to be like a daily meal planner. I mean, I go grocery shopping for a whole week at one time, but I still mix it up constantly.
It’s a gift–or a curse. But either way, that’s me.

So, this easy menu board is really simple. You just toss it together, put it on the counter, leaning up against wine bottles or mason jars and erase after dinner.
Want to make it fancier? Add a picture frame. Want to incorporate your favorite color? Put a coat of paint on the little shelf in that shade.
It’s seriously one of my favorite DIY projects for the kitchen. And it looks so much nicer than those dry erase menu boards you can buy at the store and who wants to be writing with a dry erase marker when you can use chalk?!
So, grab a paintbrush and let’s get started!

How To Make A Menu Board
So, I didn’t want to use a cutting machine for this project because sometimes it’s nice to just work through a project without all that tech. Also, I needed to clean my light grip mat and just didn’t want to. Ever have those days?

And the project is super easy to do, even without the cutting machine.
You’re just going to paint, print, cut, and paint.
For real. No jokes.

What do I Need to Make a DIY Menu Board Upcycling Project?
For this project here is what you need:
- An Old Wooden Cutting Board
- Painter’s Tape
- Scrap Length of Trim
- Xacto Knife
- Printable “Menu” Lettering
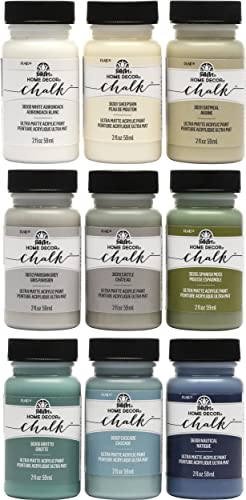
- White Chalk Paint
- Black Chalk Paint
- Paint Brushes
- Pencil
- Chalk
- Hot Glue Gun & Glue

And that’s it, I mean, so simple, right?! And the project itself is really just as quick as it is to gather all the supplies.
So, get ’em all together and let’s get crafty!
Oh, and after you pin this so you can come back to the project when you’ve got everything together, I would love for you to leave a comment on what you think of this tutorial.
If you are looking for more Home Decor Ideas for your kitchen then this Fun & Easy Decorative Craft Magnets and Reverse Canvas are a great starting point.

DIY Menu Board
This DIY menu board upcycling project is a fun and simple project for anyone who loves to DIY!
Materials
- Wooden Cutting Board
- Scrap Length of Trim
- Printable "Menu" Lettering
- White Chalk Paint
- Black Chalk Paint
- Chalk
Tools
- Paint Brushes
- Pencil
- Xacto Knife
- Painter's Tape
- Hot Glue Gun & Glue
Instructions
- With your black chalk paint and a paint brush, paint both sides of the cutting board, allowing plenty of dry time between each side.

- With the white chalk paint, paint all sides of the trim scrap. I made sure mine was just shorter than my cutting board, but you can make it longer--either way will work.
- While the paint is drying on the cutting board, using the Xacto knife, cut out the lettering from the printed sheet.

- Tape the paper to the cutting board and draw an outline of the lettering onto the chalk board.
- Paint the lettering onto the menu board in the white chalk paint.
- Hot glue the trim piece onto the cutting board, just below the "menu".


Recommended Products
As an Amazon Associate and member of other affiliate programs, I earn from qualifying purchases.